Search This Blog

Thursday 29 August 2013

Watermelon "cake" How-to

As promised here is a how- to on making a watermelon "cake" for your next party or event.
Because really, how else could you impress and delight 20 people for $3 in 15 minutes?

You will need:
- a watermelon
- a knife
- a piping bag
- butter cream icing or whipped cream
- sprinkles, candles or other decorating items
- cake plate


First things first, buy a watermelon.  Or, if you have much more forethought than I did, grow your own watermelon. 


Once home cut the top and bottom of the watermelon off like so. It now sits nicely on a flat surface without all that pesky rolling.
Watermelon sans rolling. 
Then cut the rind off
see?
Lift that puppy up and put her on the cake plate. And of course by "puppy" I mean watermelon...

Using a large star tip on your piping bag, fill the  bag with buttercream icing. 
** We interrupt this blog post for a fun game I like to call "Guess how I know that!" As it turns out, once the icing is on the watermelon you cannot smooth it out. It just slides right off.  ..... Guess how I know that....** SO!  Do not do as this photo demonstrates. Instead you will want to take a more "artistic" approach. That Guy used rosettes (swirls) because the straight piping isn't as pretty as you might be expecting. 
Do not do it this way because....

If you do it will look like this
So we took the icing off a second time and tried yet again.  
So much better
Of course sprinkles were a required next step.  Even though this was just our practice "cake" and wasn't even for the birthday celebration.
pretty
Looked good enough to eat, so indeed we did!
yummy
Then two days later we did it again for Audrey's special day. 

Once you avoid all the mistakes we made the first time, this really is only a 15 minute time commitment. At the same price as baking a boxed mix cake but with an expensive bakery look.

Monday 26 August 2013

Candy birthday for under $5 per person

Today is my daughters second birthday, Happy Birthday Audrey!

That's one happy two year old!

Yesterday we hosted her birthday celebration. We have celebrations, not parties and the difference being that we have no gifts. If someone desires to bring a token to mark the occasion we accept non perishable food and hygiene items for our local Community Care program. But I digress, that is not what this post is about.  This post is about how to host a birthday for 31 people for $150 (just under $5 per person). I originally was not going to post about this because $150 felt like so much money and I didn't want to be dishonest to the spirit of my blog.  But after the festivities were over and That Guy and I sat down and recounted the day we realized there were 31 people here.  With 11 more I had expected but did not show. Suddenly $150 for invitations, cake, decor, favours, candy and activities for that many people sounded reasonable.

First I did up these invitations with the help of a friend. The scrapbook paper was on sale 4/$1  I bought eight sheets and used six for the invitations.  The lollipop sticks we had on hand because That Guy is a pastry chef so we routinely have items like that available. The tulle bow was made from the discarded mess of my DIY tutu dress FAIL.  Total running cost $2
THESE ARE NOT MY INVITATIONS!
Mine looked very similar, but were all handed out before I thought to
get a photo.  photo credit
I was more than a little excited to shop for this event, who doesn't love candy shopping?! Party Max has deal on candy: 15 pieces for $1.  This great price got me really excited! I bought gumballs, and taffy and chocolate coins at this low price while staying within a simple colour scheme of green yellow and pink. ( We decided to go with three colours because otherwise the colour factor could just too easily get out of control) We also bought rock candy, small swirl lollipops, streamers, scoops for the candy and clear bags for the guests to fill with candy as they were leaving. This managed to set us back a staggering $65! Total running cost $67

However, using my mad cheap gumballs, some sticks from the backyard, hot glue, ribbon and tissue paper I was able to make a cute and whimsical centerpiece for the candy table. Total cost there only $3 worth of gumballs- but that cost was part of our $65 at Party Max. This centerpiece was so easy to make and I am thrilled with how it turned out!

Candy table with paper bunting flags and gumball
centerpiece 
Next was a trip to the dollar store.  There I bought toothbrushes for guest favours.  Since it was a two year olds birthday I did not see a need to give guest favours to adult guests.  Moreover, because we have a no gift policy I do not feel like I am "on the hook" to break the bank in this area. And toothbrushes were an adorable end to a candy themed day. At the dollar store I could get two individually packaged toothbrushes for $1. I bought enough only for children old enough to use them, meaning I bought 12. Toothbrush cost was $6.  Also at the dollarstore I bought six plastic table cloths (two in each of our colours), three packages of balloons, three candy jars and six giant swirly lollipops.  Dollar store total was $27.  Total running cost $94

Jar of toothbrush guest favours


Guest favors with tags
Leave it to me to stress out about not having having enough candy at a candy party. I stressed enough that That Guy finally agreed to a trip to the bulk foods store. There we bought jelly beans, three tubs of cotton candy, jujubes and candy sticks. Total cost here was $41.  Total running cost is $135.

Candy table the sequel because we had too much candy for one table


Finally we bought a watermelon and a case of water and a box of non brand name fruit o's from the grocery store coming in at $8. Total running cost $143. 
Now my shopping was done and all I had to do was pull the whole party together.

Let me tell you how great it is to have a husband like That Guy. He sat for three nights and made green yellow and pink paper chains.  Why paper chains? Super cute party decor and totally free when you already have tons of construction paper. We took the curtains off the curtain rod and hung the paper chains in front of the window instead. I totally love the effect, but I certainly couldn't have made all those paper chains on my own without That Guy.  Walter decided he also wanted to have a hand in party decorations and took paper strips left over from the chains and "decorated" the walls.


Custom decorated by 4 year old big brother Walter
I tried to make bunting flags out of some scrap fabrics I had.  I wanted to decorate the front of the candy table with it. I do not know exactly what I did wrong, but I promise you gentle readers, it was no good.  So I cheated.  I used some of my left over invitation paper, cut it into triangles and sewed it inside some on hand yellow bias tape. From a distance you can't even tell its paper.


The night before the celebration, after the kids were in bed, That Guy and I hung the six table cloths from the ceiling to our light fixture. It was magical.  We twisted streamers between the table cloths and hung balloons from the the center of the light fixture with on hand curling ribbon. I also used some balloon sticks IO had on hand (yeah, I'm the sort of girl who has balloon sticks on hand) I made up small balloon bouquets in mason jars and set them around the room.

I did buy three candy jars from the dollar store.  But for the most part I just borrowed canning jars from friends to fill with candy. I do not recommend buying a million candy jars for a single use occasion.
side view of candy table


We used six dollar store plastic table cloths and taped them to the ceiling
and our light fixture. 


before guests arrived

One more shot of the candy

I feel some of you have a burning question in your heart. "Where's the cake?!!" And since That Guy is a pastry chef its a very reasonable question.  Here is a photo of our "cake".
"Cake"
Why the quotations around "cake"? Well because it wasn't actually a cake at all! That, gentle readers, is a watermelon.  Not a watermelon flavored cake- a real watermelon. With butter cream icing and a number 2 candle. The how-to will be my next post. 

To keep the children entertained, I chose two simple activities that my two year old could participate in.  First I printed off many free sweet shoppe colouring pages and had a giant dish of crayons.  That might sound juvenile but everyone there seemed to love it- children and adults alike.  
Then the children made their own "candy necklaces".  I had taken my fruity o's cereal and separated them by colour into ice cream dishes. Then using a piece of twine the children strung their own necklaces (or bracelets depending on their attention span)

I host my events between 2-4 in the afternoon because that is the most cost effective time.  Everyone has eaten lunch and no one is expecting dinner. So I get away with finger foods (candy) and "cake".  And THAT is how I hosted a candy birthday for over 30 people for less than $5 per person. 

Thursday 22 August 2013

DIY Dino hoodie- $8 childs birthday gift

Good morning, gentle readers!

This upcoming weekend is jam packed with fun. Among other activities there are three birthdays this weekend. One of which is my daughters second birthday, the other two are friends of my kids who have birthdays.  So I basically decided to take the easy way out and make all three children the same birthday gift.  I made them each a dino hoodie.  These things are so cute and take less than an hour to make.

Here is what I used:
- one solid coloured hooded sweatshirt . You can get them from either Giant Tiger or Wal-Mart for $8
- up to two sheets of craft felt (the smaller the hoodie the less you need)
- iron on interfacing (I imagine sew on interfacing would work even better, but I did not have that on hand)
- sewing machine
- straight pins

First things first, take your sheet of craft felt and cut it in half lengthwise. Now fold one half in half again, still lengthwise. You may want to pin it so that it stays folded.
cut felt in half lengthwise
I used a piece of scrap card stock  (but any paper would do) to make the template for my spikes. I just kind of guessed at it. The spikes should fit onto the quarter sheet of craft felt. Any bigger than this and they may start flopping over when the hoodie is worn.  Because I am the furthest thing from artistic I just made a shape that didn't look too far from a dino spike or scallop, then I folded my card stock in half and trimmed so that I was sure everything was symmetrical. Hold onto your template.

Using a pen or a felt tipped marker trace your template as many times as you can onto your folded felt with the base of the spike at the fold. Repeat on as many felt halves as needed (I found that hoodies sized from 2-4T used only one sheet of felt - both halves-, and anything over that used more)
tracing the template onto the felt
Next step is to cut out the spikes. Be sure when you are cutting that you do not cut the fold! Just cut the "top" of the shape and not along the bottom.

Now we pin our spikes to the hood and down the back. I do recommend unzipping and opening the sweater from this point on or you *might* pin and sew through both the front and back by accident.....   If you think you will need help lining everything up straight just grab a piece of chalk and a ruler and draw a line down the back to help you out. Place your spikes with ends touching but not overlapping.
ends touching but not overlapping
Next just run one quick and continuous seam down your sweater on your sewing machine. The seam should run right through the center of all your shapes.
stitched down the center
If you are using iron on interfacing you will need to take your template and cut it smaller. Iron on stuff is not good to run through your sewing machine so you will need to leave enough room on the craft felt uncovered by interfacing that you can stitch your spikes shut without the needle coming into contact with it.  If you are using sew on interfacing you should be good to just trim your template down a hair. Use your template to cut your interfacing. No need to cut on the fold this time, so cut around your whole shape. Interfacing should not go over the center seam you just sewed so that your felt can fold sharply - interfacing would prevent that.   You will need twice as many pieces of cut interfacing as you needed for the craft felt.
adjusting the felt template for interfacing
Lay your interfacing down onto your open spikes and break out the ole iron. Just a quick pass on a steam setting will do just fine.
interfacing ironed down
Now, we just sew each spike closed.
spikes sewn shut
The first time I made this I figured I was done at this point. But the hoodie kept calling me back.  It just didn't look finished.  I finally decided I needed to pull the colour of the spikes to the front of the sweater for a more complete and unified look.  So I decided to cut mini spikes out of some of the left over craft felt and hand stitch it to the front pockets. I feel like that was exactly what it needed to look finished.
pocket detail for the front 
With my daughters sweater I made scallops instead of spikes for a bit of a softer look (shes just not a spike kind of a girl) and then, using fabric paint, added some quick polka dots.  Finally I hot glued together a little felt bow onto a safety pin and added the pin to her hood. The pin can be removed for washing.


adding fabric paint
lil felt bow on safety pin


Taa-daa!! My daughter loves this sweater.  Yes, I gave it to her before her birthday, but it was too cute not to.
Audrey loving her sweater


Just wanna squish her!

back of the sweater

All three sweaters I made up for this weekend. 

Monday 19 August 2013

DIY gift for new baby girl -$2

This past weekend we went to see some dear friends of ours who live in a different city.  Recently these friends expanded their family by one with the birth of their daughter, now making them a family of four.

I was pretty darn excited to finally meet their sweet girl and be able to celebrate with them. Of course I wanted to make a small gift for sweet baby Hilary and this is what I came up with.

Total cost to me was $2, for the flower pot and floral foam both from the dollar store.  Everything else I had  on hand.

Here is what you would need:
materials
flower pot - $1
floral foam - $1 (although one brick of foam would easily do two pf these gifts)
green tissue paper - on hand
assortment of silk flowers - on hand
floral wire - on hand
hot glue gun and sticks - on hand
shelf liner - on hand
rhinestones, pearl halves and other decorative floral centers - on hand
hair clips - on hand

First I cut the foam to fit into the pot. I like to keep the plastic on the foam for as much of this process as I can since the foam feels so strange to me.
floral foam in the pot
Next I folded up a piece of green tissue paper and placed it on top of the foam in the flower pot.
tissue paper
Then I took my floral wire and cut each wire in half and set them aside.

Now I pulled apart my silk flowers.  I buy my silk flowers from the dollar store when I need them. But when making hair clips you may find that these flowers look a little sparse. I rectify this by using two flowers for each clip, layering them atop each other.  This gives a nice full look to the flower for a cost much lower than buying fancy silk flowers from an arts and crafts store.
Dollar store silk flowers
Remove flowers from the stems by taking out the center
pieces of two flowers ready for hot glue

I hot glue everything together with a gem in the center of the flower like so,
volia

Set your flower aside for a moment to prepare the clip. 
I find it best to add small strips of shelf liner to in sides of hair clips to help them grip well to thin or fine hair. Just cut your strips and hot glue them to the interior of the clip. 
Helps the clip stay put

Repeat with as many different flowers as you would like.  I did a total of six flowers.  Once you have all your clips made push your floral wire into the foam in your pot. I have found this looks best if the length of the wires are different. Then you simply clip your flower hair clips to the top of the floral wire and admire :) I also added a bow hair clip i had on hand  to the front of the bouquet.  I printed out a quick sign and hot glued two pieces of floral wire to the back and stuck that in the pot as well.
Taa-daa!  
I was pretty pleased with it, and thought it looked adorable.  That is, until Hilary's mom sent me this photo.... Next to that face I couldn't make anything to compare in adorableness :)


Welcome baby Hilary!


Thursday 15 August 2013

DIY childs costume- $13 Astronaut

As promised this is Walters costume wear for the upcoming All Canadian Pageant.
He is an astronaut!

We did this costume for $13 total. $12 of which was for duct tape (10 rolls of white, one of blue and one of red) and $1 for a cheap plastic ball. All items were found at the dollar store. I almost paid $6/roll for duct tape (before I knew how many rolls I needed) when a friend said "I think I've seen white duct tape at the dollar store....."  Thank goodness she said that!

I had seen this idea online somewhere, but all I was given insofar as a "how-to" was one photo and a warning not to use fabric paint- duct tape really is best.
Since I am thrilled with the results I think you, my dear and gentle readers, deserve a step by step how to for this DIY astronaut costume.

I used:
duct tape (as mentioned above)- $12
Walters old snowsuit - on hand
Walters old snow boots - on hand
Worn out childrens gardening gloves - on hand
Plastic ball - $1
Newspaper for paper mache - on hand


For the record, although this is technically for the pageant, this is the costume Walter will be wearing for Halloween. Since it's done I'm feeling pretty happy about being proactive. :)

I started off with Walters old snowsuit from last year.  It was just a touch too small for this year and the knees of the snow pants had small tears from last years play. If you don't have old snowsuits to start with you could try a second hand store. However, I really believe your best bet is to check and see if you live in a Frugal Mommy area and reach out through that resource first.  This is not the first time I have mentioned Frugal Mommy, and I'm sure it wont be the last.  It is a fabulous way to get rid of things you no longer have use for while finding things you need. Here is the link : www.frugalmommy.org.

First thing you will want to do with your snow suit is stuff it. I used towels. Make sure you stuff it firmly or the tape will cinch your suit.
jacket stuffed with towels
Next you will cut strips from your roll of duct tape and run them down the arm from the shoulder, folding under the wrist opening. If your jacket has elastic wrists like ours did just stretch the elastic to its widest when applying the tape. When you relax the elastic after the tape will fold is just like the elastic casing on the jacket did originally.
You do not want to start at the wrist and wrap the tape in circles winding up the arm. It looks terrible that way - really, really terrible. Guess how I know that..... *le sigh*
see how awful the arm looks here? and how much better the torso looks? Strips are your friend!
When the arms are done run strips of tape over the torso of the coat. Run from the bottom hem of the front of the coat up, over the chest and shoulder, down the back and ending by tucking under the bottom hem on the back of the coat.

Once the coat is all done add any decals you wish. we chose to keep it fairly simple. That Guy made the Canadian flag from red and white duct tape and the NASA logo also from duct tape. Pretty impressive, right?  I thought so too. :)
That Guy's handiwork is pretty impressive! 
When the coat is done take the towels from it to use them to stuff the snow pants. Using long strips run the tape from the ankle of the pants up to the top, continuing around each leg,
pants
If you are using a one piece snowsuit, then good on you! This project will be easier and would look even more astronaut - y. Once the pants are complete add any decorative touches you wish.
Smile! The biggest part of the costume is done!!

This is not hard work, just lots of taping!

Next I covered Walters winter boots in duct tape. These boots still fit him fine (I wouldn't have him running around all night on Halloween in boots that are too small) but they were a second pair he had.  To be clear, I bought them second hand, no special brand name but in decent shape and perfectly functional for our needs. Then the in-laws decided to buy him brand new licensed character boots with light up soles. Guess which boots got banished to the basement and never worn? Yup, the "boring" non light up ones I had bought him. So those are the ones I covered in tape to make into moon boots.
Nothing complicated about doing the boots at all. I didn't even add any decorative touches, just left the velcro closures outside of the tape.
Boots all taped up
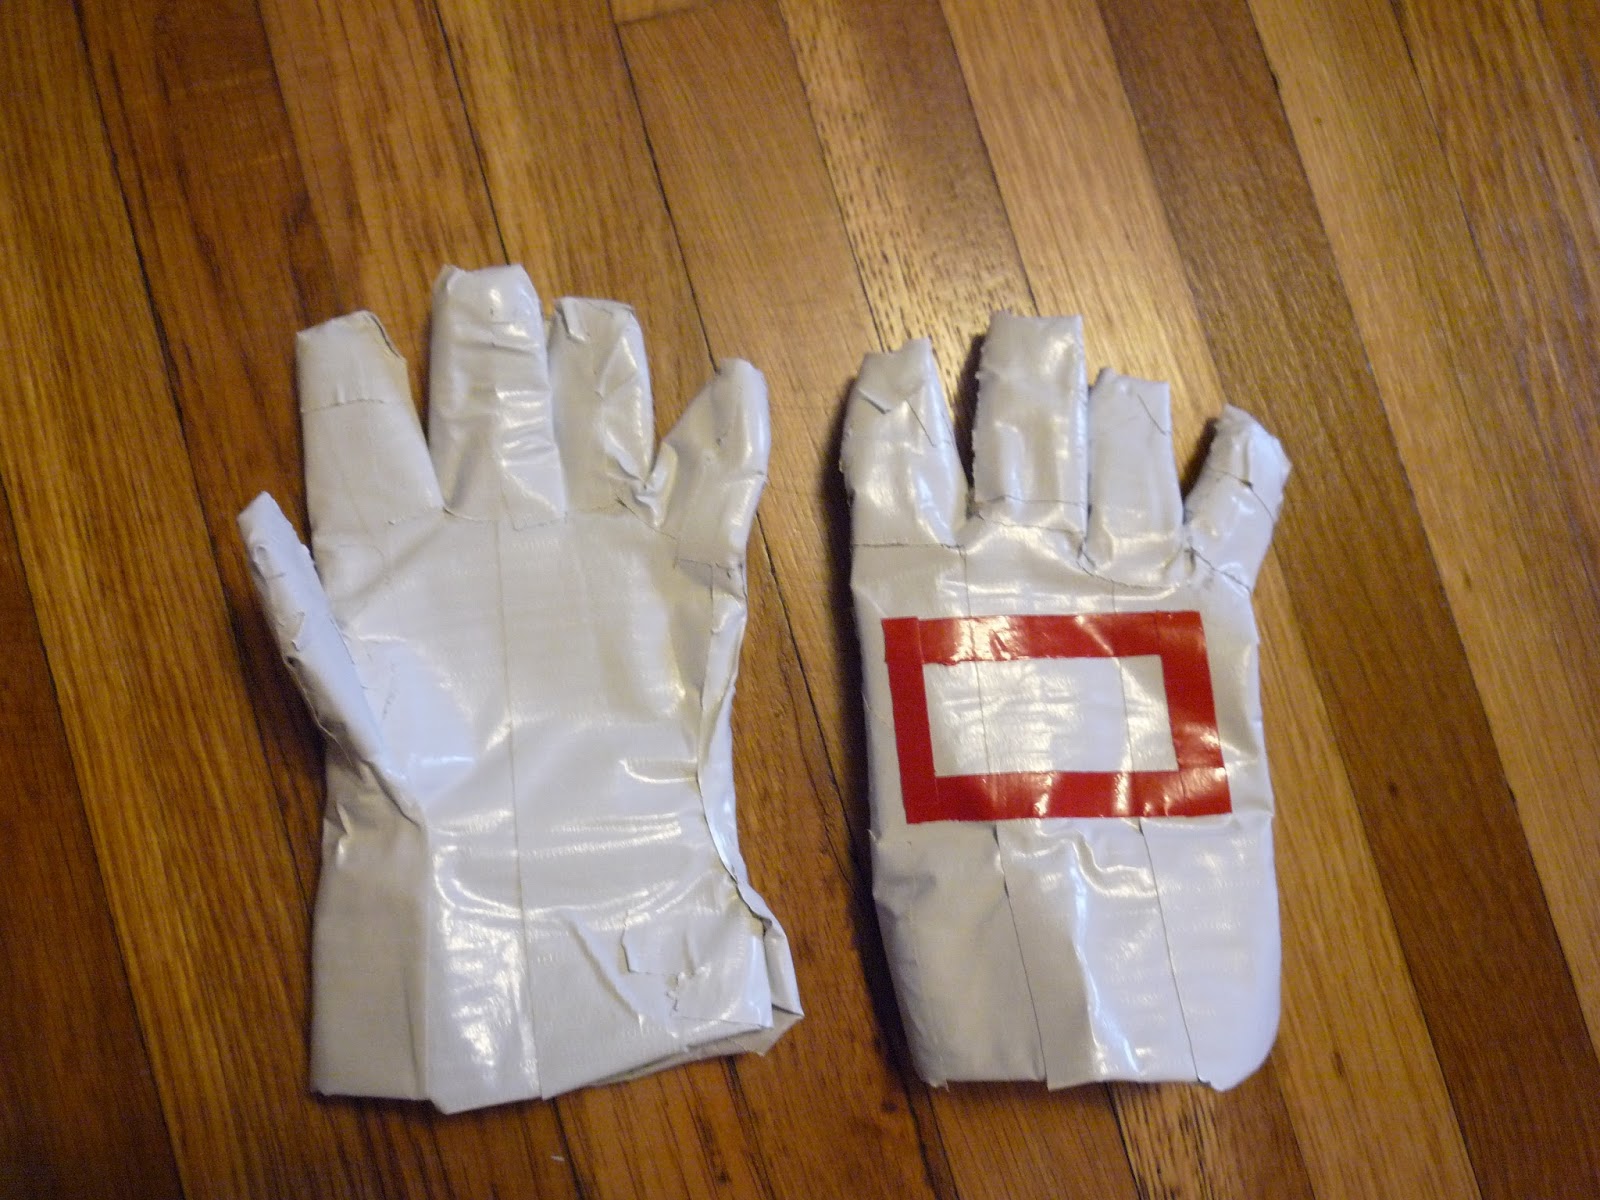
Then we moved on to the gloves.  These gardening gloves had originally been purchased from the dollar store last year. They were now at the point of uselessness due to wear and tear.  But for covering in duct tape they were perfect.  These take a bit longer than one might think because each finger needs to be taped individually.  That Guy added simple red tape patches to the gloves and it makes all the difference from gardening gloves to astronaut gloves.
gardening/ astronaut gloves

Ah, the helmet! The last costume piece. I used a ball and paper mache for this. I did not want to use a balloon because I find balloons warp  out of a perfectly round shape the larger they are inflated, and I needed something big enough for Walters head.

Covering the plastic ball
Using the most basic paper mache recipe (two cups flour, two cups water, one tablespoon salt) I got to work. I covered the whole ball several times over three days. Be careful  if you decide to let your helmet dry outside in the sunshine. It *might* get chewed up by squirrels who don't look the least bit remorseful when you're standing the backyard shouting at them like a lunatic.... Just saying that might happen.

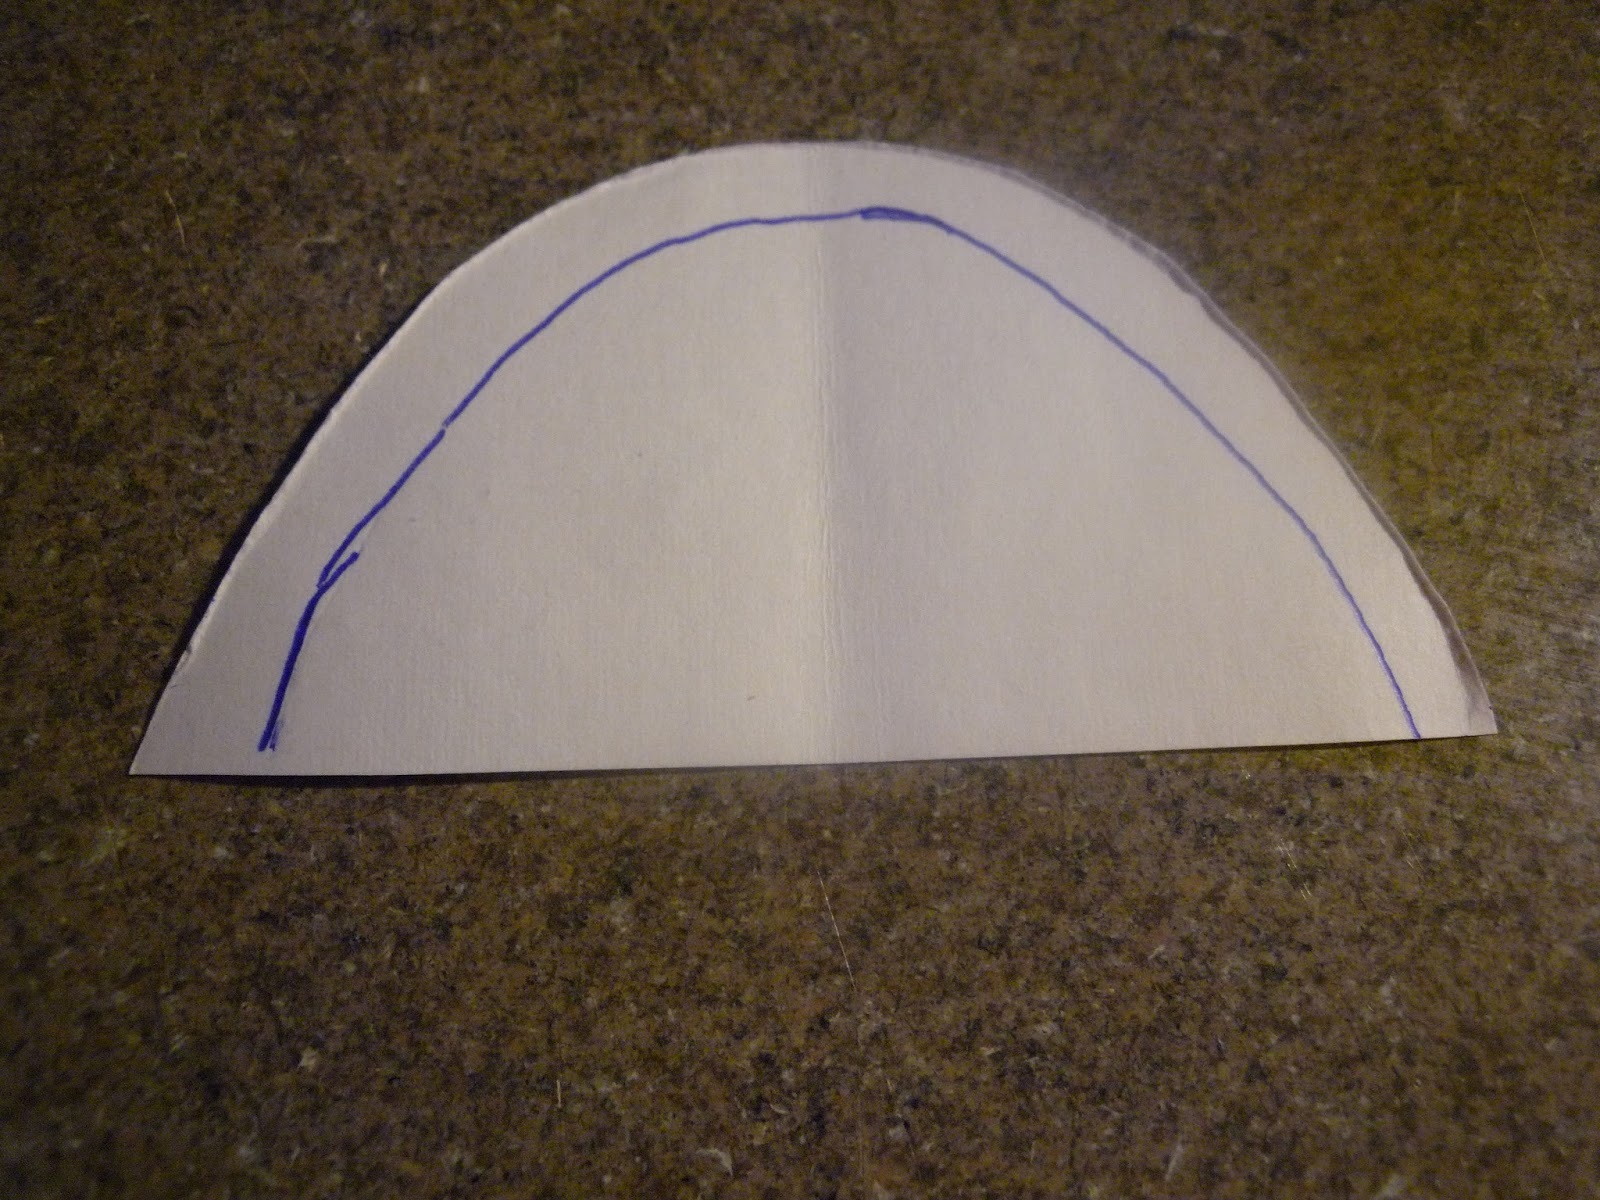
Once the  exterior finishes drying (inside the house) it will be time to cut the face opening. Using an Xacto knife just plunge it right in there.  With care and concern for your personal safety of course. This will pop the ball inside rendering it useless.
That Guy cutting into the helmet for me
 Finish cutting the opening and remove the ball from the inside.  You will likely be tempted at this time to cut the opening to slide over the childs head so he/she can wear this helmet.  Let me caution you against that. Turns out, paper mache shrinks when it dries. And since the very inside layer of the mache is damp when you pop the ball,  it will shrink. Go on, guess why Walter is holding his helmet in the photo rather than wearing it......
face opening after ball is removed from the inside
Cutting a neck opening- what NOT to do while its still even remotely damp


I would still like to add some blue and red decals to the helmet, but I think you get the idea pretty well.

So there it is, a whole space suit costume for $13. And warm enough that he can actually wear it as is on Halloween night.....anyone else still resentful that their mermaid costume was totally ruined because your parents insisted  you wear a winter coat under your seashell bra?? Astronaut costume will not have that problem!

Taa-daa!!!